
If you want a single resource you can follow without guesswork, this home plumbing maintenance checklist walks you through the full year, so you can spot small issues early and keep your system running smoothly.
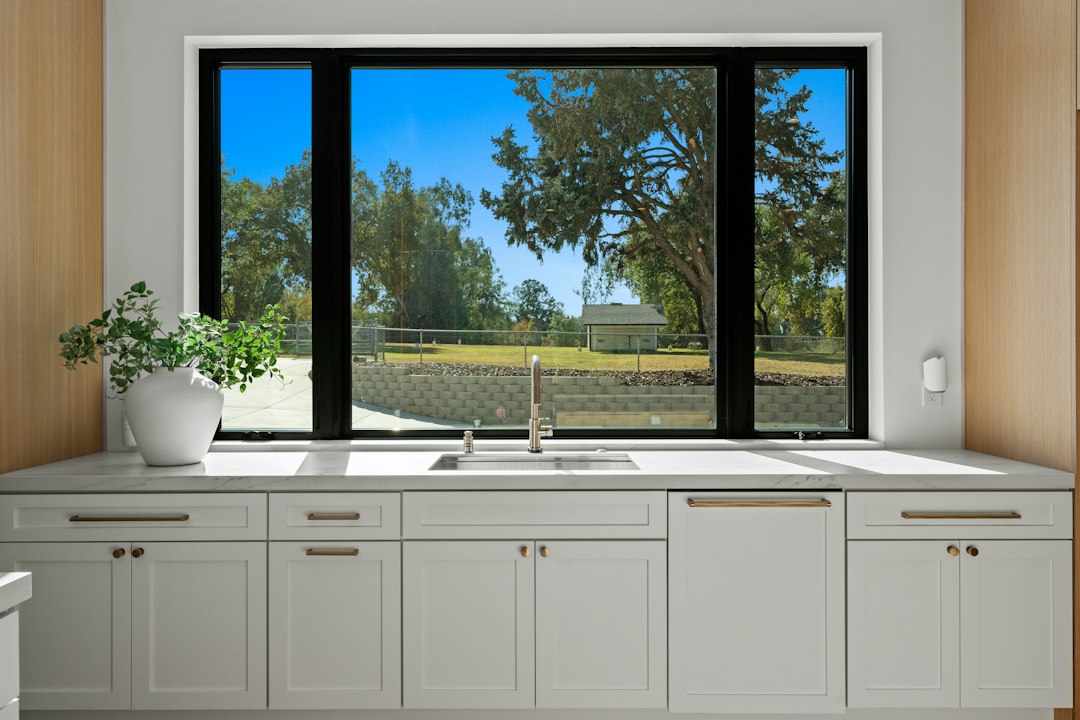
home plumbing maintenance checklist: at-a-glance
Think of your plumbing like a quiet utility that appreciates a little attention on a schedule. This quick overview shows how the workload spreads across the year, with short recurring habits and a few deeper passes. Use it as a template you can adapt to your climate, water quality, and household rhythm.
- Monthly: Leak scans, slow-drain tests, trap refills, disposer refresh
- Quarterly: Toilet and faucet service, aerators, showerheads, appliance hose checks
- Warm season (spring/summer): Sump and ejector pump tests, hose bibs, irrigation review, water-saving tune-ups, scale control
- Cold season (fall/winter): Shutoff exercises, gutter and yard-drain checks, pipe insulation and heat tape checks, freeze strategies
- Annual: Water heater flush and inspection, expansion tank review, pressure check, shutoff labeling and documentation
Two themes run through this guide: early detection and documentation. A flashlight, a notepad, and a few labels can save hours later. If you prefer digital, take date‑stamped photos and store them in a shared album.
Setup: tools, safety, and how to use this list
Most maintenance in this checklist is light, visual, and within reach for typical homeowners. When the work moves toward gas fittings, main drains, or anything that feels uncertain, bring in a licensed professional. Your goal here is to reduce surprises and keep DIY work calm, tidy, and safe.
- Basic tools: Flashlight or headlamp, towels, small bucket, adjustable wrench, slip‑joint pliers, screwdriver set, plumber’s tape (PTFE), utility knife, rags, vinegar, soft nylon brush, nitrile gloves.
- Optional helpers: Hand auger (drain snake), plunger with cup and flange types, moisture meter, non‑contact voltage tester, inexpensive inspection mirror, camera phone for photos.
- Safety: Cut power at the breaker before removing covers on electric water heaters or garbage disposers. For gas appliances, set controls to vacation or pilot mode before service and keep the area clear. If you smell gas or see scorch marks, step back and call a qualified pro.
- Valves and practice: Know the main shutoff, individual angle stops at sinks and toilets, and the water heater cold supply valve. Gently cycle each valve a quarter turn and back to keep them operable.
- Labels: Tag the main shutoff, exterior spigots, appliance valves, and any hidden isolation valves. On the water heater, label the T&P discharge line for easy identification.
- Notes and intervals: A small spiral notebook or a notes app works. Log tasks with dates, such as “Primary bath aerator cleaned 2026‑05‑01,” to reveal patterns in scale, leaks, or noise.
Time investment stays modest. The monthly pass is often 30–45 minutes. Quarterly work can be an hour or two. Seasonal and annual items can be grouped on a weekend morning. The payoff is fewer emergencies and a clear sense of what’s happening inside your pipes and fixtures.
Monthly routine: sinks, drains, traps, and leak checks
Monthly habits keep odors down, keep traps hydrated, and reveal tiny issues before they grow. Use the same loop through your home each month, so you don’t miss a room.
- Slow‑drain test: Run water for 60 seconds in each sink and shower. Watch the waterline: does it stand or does it spin away briskly? A slight slowdown this month often becomes a clog next month. Note any gurgles; they suggest partial blockage or a venting issue.
- Trap hydration: For floor drains, basement baths, and infrequently used fixtures, pour a quart of water to refill the trap. Add a tablespoon of mineral oil in seldom‑used drains to slow evaporation. This reduces sewer odors.
- Under‑sink scan: Open cabinet doors, shine a light on the trap, tailpiece, and supply lines. Use a dry tissue around joints and angle stops to catch hidden moisture. Look for green or white crust on copper or brass fittings (minerals) and for water spots on cabinet floors.
- Meter glance: When no one is using water, check the small leak indicator on the water meter. If it moves, something is flowing somewhere. Shut off toilets one by one to isolate the source. If movement continues, it may be a slab, irrigation, or concealed line—good to escalate sooner.
- Disposer refresh: With cold water running, grind a tray of ice and a small handful of rock salt. This scours the chamber gently. Follow with a splash of vinegar to reduce odors. Avoid hard pits, shells, and fibrous foods that tend to bind.
- Shower and tub strainers: Clean hair and soap film from strainers and covers. A quick scrub now is easier than a deep clean later.
Tip: Keep a small “plumbing caddy” with rags, tape, and tools under the kitchen sink or in a hall closet. The easier it is to start, the more likely you’ll keep the routine going.
Quarterly routine: toilets, faucets, and appliances
Every three months, take a deeper pass through the fixtures you touch most. Small adjustments in these locations can lower water use and improve day‑to‑day comfort.
- Toilet dye test: Add a few drops of food coloring to the tank. Wait 10–15 minutes without flushing. Color in the bowl points to a flapper or flush valve that isn’t sealing well. Replace worn parts with the correct model; it’s inexpensive and can cut water waste quickly.
- Tank internals check: Lift the lid and listen. A subtle hiss or repeated refill hints at a fill valve issue. Confirm the fill tube is aimed into the overflow, adjust the float height to match the manufacturer’s line, and verify the chain has a little slack without tangling.
- Aerators and flow: Unscrew faucet aerators, soak them in vinegar for 30 minutes, scrub with a soft brush, and reinstall. For worn threads or leaking spouts, apply a wrap or two of PTFE tape to the male threads before reinstalling the aerator.
- Showerheads: Fill a small baggie with vinegar, secure it over the head with a rubber band, and let it soak for an hour. Brush mineral nozzles gently and rinse. Check for even spray and unexpected drips from the arm joint.
- Dishwasher and laundry hoses: Examine braided stainless lines for bulges, frayed stainless, rust at the crimps, or cracking. Replace anything suspicious. Clean the dishwasher filter and inspect the under‑sink drain connection for seepage.
- Noise check: Banging when valves shut is water hammer. Arrestors at quick‑close appliances or careful valve throttling can help. If noise persists, a professional can evaluate pressure and pipe supports.
Make it easy on yourself: keep a small bin with spare flappers, wax ring, supply lines, hose gaskets, and a couple of braided hoses. Replacing on your schedule beats finding a part during an emergency.
Warm-season tasks: spring checks and summer tune-up
As temperatures rise and rain increases, focus on moving water away from the structure and preparing exterior fixtures for heavier use. Then, use early summer to refine efficiency and scale control.
- Pumps and pits: For a sump pump, pour a bucket of water into the pit to lift the float. Confirm the pump starts promptly and discharges outside. Clear sediment from the pit and ensure the check valve points the right way. If you have an ejector pit (for basement bathrooms), confirm the lid is sealed and vented properly.
- Backup strategy: If your basement relies on a pump, consider battery or water‑powered backup. Test existing backups, check battery age and voltage, and verify alarms sound properly.
- Hose bibs and sillcocks: Open exterior spigots and watch inside walls for signs of trouble. Frost‑free sillcocks can crack internally if hoses were left on during a freeze. Replace worn vacuum breakers to lower the risk of contaminated water flowing backward into the home.
- Gutters, downspouts, and yard drains: Clean roof gutters and confirm downspouts discharge well away from the foundation. Check yard drains and storm inlets for leaves and sediment. Water should never pool near the foundation after a short hose test.
- Irrigation lines: Slowly pressurize, watch for wet spots, and run a test cycle. Adjust heads to keep water off siding, windows, and sidewalks. Confirm the backflow device is dry and steady.
- Water‑saving tune‑ups: Set bathroom faucet aerators around 1.2–1.5 GPM, kitchen 1.8–2.5 GPM to balance function and efficiency. If you find crusty rings on fixtures, you likely have hard water. Increase the frequency of vinegar soaks or consider a scale‑control device.
- Vacation routine: If you’ll be away for more than a few days, set the water heater to vacation or its lowest setting. If no appliances require water, consider closing the main valve. Ask a neighbor to run a tap weekly to keep traps wet and to spot problems early.
Tip: Take photos of pump setups and valve positions in spring. In a heavy storm, you can confirm everything looks the same at a glance.
Cold-season tasks: fall readiness and winterizing strategy
As weather cools, think about control and insulation. You want water to go exactly where you intend, and you want pipes to stay above freezing even during short cold snaps.
- Shutoff exercises: Gently close and open the main valve. If it is a stiff gate valve, plan to replace it with a ball valve during your next plumbing project. Test appliance angle stops for smooth operation; replace any that seep or refuse to move.
- Perimeter drainage: After the first leaf drop, clean gutters again. Confirm downspouts extend away from the foundation. Revisit yard drains and clear debris a second time.
- Sump discharge path: Inspect the pipe that carries water away from the pump. Confirm it’s not frozen, crushed, or blocked. Make sure any backflow devices are working and the line pitches away from the house.
- Insulate vulnerable lines: Wrap pipes in unheated garages, crawlspaces, and attics with foam sleeves. Seal air gaps where cold wind enters, especially near hose bibs and sill plates. Exposed PEX is more forgiving than copper but still deserves insulation.
- Heat tape review: If you rely on heat tape, confirm it’s compatible with the pipe material and in good condition. Replace frayed or questionable lengths. Follow manufacturer instructions for spacing and attachment.
- Freeze strategy: During brief cold snaps, a pencil‑thin stream at far‑end faucets can keep water moving through vulnerable runs. Open cabinet doors on exterior walls to let warm air circulate around supplies.
- If a line freezes: Turn off the nearest valve or the main, then warm the area gently with room heat or a hair dryer aimed at the pipe. Do not use open flame. If you suspect a split, keep the water off and contact a professional.
Small steps can dramatically lower the chance of freeze damage. Focus on insulation, air sealing, and a simple drip plan for the coldest nights.
Water heater care: tank and tankless essentials
Your water heater quietly produces some of the most expensive gallons in the house. A few checks extend comfort and efficiency while reducing the odds of a disruptive leak.
- Temperature setting: Many households prefer 120 °F for comfort and energy savings. Higher settings tend to use more energy and can speed up scale formation.
- Annual flush (tank style): Attach a garden hose to the drain valve, route it to a safe drain or outdoors, and drain a few gallons—or perform a full flush per the manufacturer’s instructions—until water runs clear. Sediment removal helps quiet rumbling and improves efficiency.
- Anode rod awareness (tank style): The anode protects the tank lining. In hard‑water regions, it may be consumed faster. Inspect per the manual. If the rod is heavily diminished or coated in mineral layers, plan a replacement with a pro.
- T&P valve test (tank style): Place a bucket under the discharge line and briefly lift the lever on the temperature & pressure valve. It should open and then reseal cleanly without a steady drip. If it doesn’t reseat, contact a pro.
- Expansion tank check (closed systems): Tap the tank; a hollow sound near the top and a duller sound near the bottom suggests proper air/water separation. If the Schrader valve releases water or the tank feels waterlogged, it likely needs attention.
- Combustion air and clearance (gas units): Keep the area around the heater free of storage. Dust intake screens if present. If you notice soot or smell gas, stop and call a qualified technician.
- Tankless notes: Descale per the manufacturer’s instructions—often annually in hard water. Clean inlet strainers, and confirm condensate lines (on high‑efficiency units) drain freely.
Pro tip: Log the water heater’s install date somewhere obvious. Traditional tanks often serve 8–12 years depending on water quality and usage. A dated note helps you budget for the next one.
Water pressure, expansion, and valves
Too much pressure stresses joints, seals, and appliances. Too little pressure makes daily life frustrating. Finding the sweet spot helps everything last longer and work better.
- Measure pressure: A simple screw‑on gauge at a hose bib or laundry tap reveals your static pressure. Many homes are comfortable around 50–70 psi. If you see readings well above that, talk to a professional about a pressure‑reducing valve (PRV).
- Watch for symptoms: Frequent drips, leaking supply lines, and noisy pipes may track back to high pressure. Conversely, slow fill at fixtures can be debris in aerators, partially closed valves, or low pressure.
- Expansion control: In closed systems (often with PRVs), an expansion tank absorbs the thermal expansion from a water heater cycle. If the expansion tank fails, pressure spikes can open T&P valves or stress joints. Keep an eye on it during your annual water heater review.
- Valve mapping: Make a simple map of key valves: main, water heater, exterior spigots, and appliance stops. Color‑code if helpful. Time yourself turning off the main so you know how long it takes during a leak event.
- Exercise valves: A valve that never moves tends to seize. Once or twice a year, gently close and reopen fixture stops and the main. If an angle stop weeps at the stem afterward, snug the packing nut slightly.
If your home uses well water or a booster pump, confirm the pressure switch and tank are set per the system design. Changes to pressure can ripple across fixtures and appliances; make adjustments with care and good notes.
Water quality and filtration choices
Water quality affects taste, scale, appliance wear, and how often you’ll be cleaning aerators. Your approach can be lightweight (point‑of‑use) or whole‑home, depending on your goals and budget.
- Know your basics: If you’re on municipal water, check the annual water quality report for hardness, chlorine, and other parameters. Well owners can use test kits to check hardness, pH, iron, and manganese. Hardness is a strong predictor of scale buildup.
- Point‑of‑use filtration: Under‑sink or faucet‑mounted filters can improve taste or target specific contaminants. Replace cartridges on schedule. An overdue filter can restrict flow and underperform.
- Whole‑home filters: Sediment and carbon filters help protect fixtures and reduce odors. Mount housings where they are easy to reach and label the install and change dates on the cartridge with a marker.
- Scale management: In hard‑water areas, expect to descale showerheads and aerators more often. Evaluate a scale‑control device or softener if buildup is aggressive and harming fixtures or appliances. Weigh maintenance needs, salt availability (for softeners), and space requirements.
- Appliance protection: Some dishwashers and tankless water heaters require inlet strainers or recommend specific filtration. Keep spare screens on hand and add strainer cleaning to the same cadence as aerator cleaning.
Whatever you choose, predictable maintenance beats reactive repairs. Treat filters and conditioning equipment like you would an air filter: note the date, and swap on schedule.
Drain care and safe clog clearing
Clogs are part of home life. What you do in the first few minutes often determines whether it’s a quick return to normal or a bigger repair.
- Start mechanical: Most sink and tub clogs respond to a plunger or a small hand auger. For plunging, create a good seal and use steady strokes. For snaking, feed gently and retrieve debris instead of ramming it through the trap.
- Trap service: Place a bucket under the trap, loosen slip nuts by hand or with pliers, and clear the debris. Replace deformed washers. Reassemble gently and test with a running sink, checking for drips with a tissue.
- Gentle maintenance: Enzymatic products can help maintain flow when used per directions. Avoid mixing chemicals, and avoid high‑pressure devices not rated for indoor use. Harsh chemicals can harm finish surfaces, gaskets, or certain pipe materials.
- Kitchen habits: Wipe greasy pans before washing, use strainers, run cold water during disposer use and for 15–20 seconds afterward. Keep fibrous foods, coffee grounds, and hard pits out of the disposer to reduce jams and dulling.
- Know when to escalate: Recurrent clogs on one branch, gurgling across multiple fixtures, sewage odors, or backups in low‑level fixtures point to bigger concerns—venting, a main line obstruction, or roots. That’s the moment to involve a pro with a camera and proper equipment.
As with most plumbing care, patience and simple tools solve a surprising number of drain issues. Force and harsh chemicals often create new problems.
Emergency prep, documentation, and cost planning
Prepared homes handle surprises calmly. A few small steps help keep a leak or backup limited in scope and duration.
- Shutoff map: Draw a simple map showing the main, water heater, exterior spigots, and appliance valves. Tape it inside a utility closet and save a photo to your phone. Make sure everyone in the household knows where the main is and how to use it.
- Contacts: Keep the number of a trusted plumber on the map and in your phone. If your region gets sudden freezes, ask about after‑hours support ahead of winter.
- Response kit: Store towels, a mop, a wet/dry vacuum, plumber’s tape, a small bucket, and a spare wax ring for one toilet. If you have a sump, keep a battery lantern near the pit for quick checkups during storms.
- Budget: Set aside a small monthly amount for plumbing parts and service. Lines, flappers, supply hoses, and valves wear gradually. A cushion lets you replace tired parts proactively instead of delaying until a failure.
- Documentation: Keep a simple log with part numbers, dates, and photos. It speeds up conversations with professionals and supports warranty claims.
- Learn more: Explore practical tutorials and gear reviews in the FamilyTechy Plumbing section. Bookmark it so you can find reference guides quickly when you need them.
When you rehearse basic steps—like closing the main and unplugging a disposer—stress drops. Easy access to gear and information is half the battle.
Frequently asked questions
How often should I flush a tank‑style water heater? Many homeowners do a partial drain every few months and a more thorough flush once per year, adjusting for sediment levels and the manufacturer’s guidance. If you hear rumbling, it may be time sooner.
Is chemical drain cleaner okay for slow drains? Gentle enzymatic products, used as directed, are often chosen for maintenance. If a clog resists a plunger or a hand auger, calling a pro is usually smarter than pouring harsh chemicals that may damage finishes or certain pipe materials.
My toilet runs occasionally. What should I check first? Use the dye test described above. Then inspect the flapper for warping or mineral buildup and verify the fill valve shuts off reliably. Replacing a worn flapper is quick and inexpensive.
What temperature should the water heater be set to? Around 120 °F is common for comfort and energy savings. Check your appliance manual for the recommended range and consider household preferences.
Is water hammer a serious issue? Repeated banging can stress joints and appliances. Arrestors and careful valve adjustments can calm many systems. Persistent noise is worth a professional evaluation to protect piping and fixtures.
How do I know if I have a hidden leak? The monthly water‑meter check is your friend. With all fixtures off, watch the small leak indicator. If it moves, isolate fixtures by closing their stops one at a time. If movement continues, investigate irrigation and concealed lines or get a professional inspection.
Do I need a softener? It depends on your goals. If you have noticeable scale, frequent aerator cleanings, or appliances accumulating mineral deposits, consider scale management. Some households prefer point‑of‑use filtration and frequent descaling instead of a softener. Choose what fits your water, space, and maintenance comfort.
Should I close the main valve when traveling? If no appliances need water while you’re away, closing the main can reduce the impact of any surprise leak. Combine that with setting the water heater to vacation or its lowest setting. If you have a house‑sitter or neighbor helping, show them the shutoff map and your preferred steps.
Small, steady maintenance wins in plumbing. Whether you’re cleaning a single aerator or labeling your main shutoff, every task adds certainty. Over a season or two, notes and photos form a living record, clogs appear less often, and the system simply feels calm. Keep this checklist nearby, adapt it to your home, and revisit it like clockwork. The routine pays you back in quiet, reliable water every day.