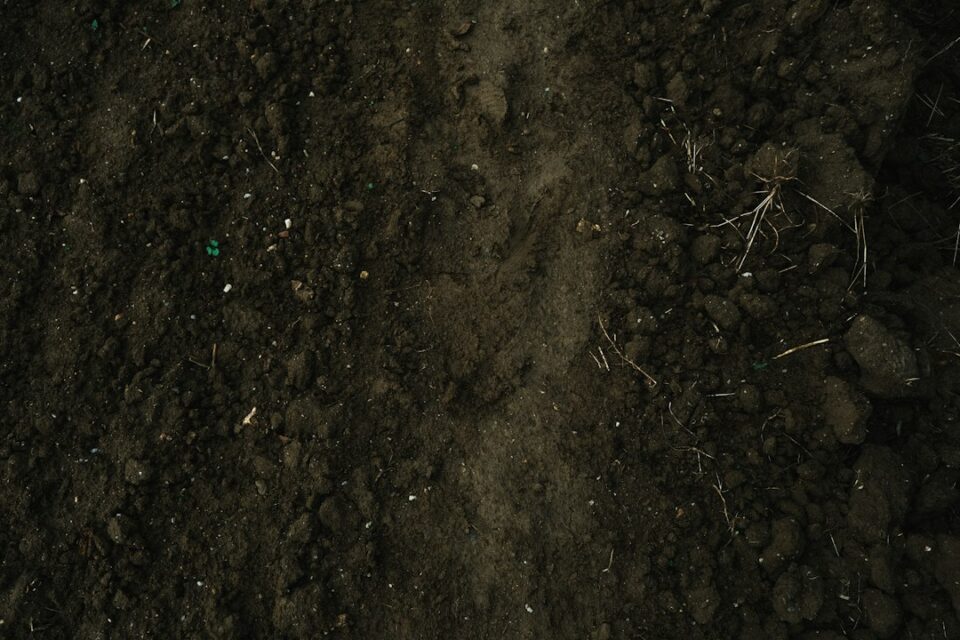

Done right, a no dig garden bed produces healthy soil, fewer weeds, and abundant vegetables without turning the earth. If you want a garden that builds fertility year after year with less strain on your back and more resilience in drought or rain, this approach is for you. The method is simple: smother weeds with a light-blocking sheet, stack organic materials that feed soil life, plant, and keep adding mulch. What follows is a practical, realistic guide based on what actually works in home plots, community gardens, and small homesteads.
What is a no dig garden bed?
A no dig garden bed is a growing area created and maintained without tilling or turning the native soil. Instead of loosening the earth mechanically, you build up layers on top: a light barrier (often cardboard) to suppress existing vegetation, a generous layer of compost for planting, and a protective mulch to conserve moisture and support soil life. Over months and years, worms and microbes pull organic matter downward, creating a deep, crumbly profile that roots love.
People call this approach by many names: sheet mulching, lasagna gardening, no-till, or simply mulching. The shared idea is to let biology do the heavy lifting. Rather than “breaking” compacted earth, you focus on feeding life at the surface and protecting it. As the bed matures, you’ll notice easier weeding, better water retention, improved soil structure, and richer biodiversity. The first season already feels different, but the second and third seasons often bring the biggest jump in plant vigor as the underground web becomes more active.
Because you aren’t inverting soil with tools, you avoid exposing dormant weed seeds to light, which keeps new weed flushes to a minimum. You also avoid disrupting fungal networks that transport nutrients between roots. The result is a stable, living bed with steady fertility, ideal for salads, greens, roots, fruiting crops, flowers, and herbs.
Why choose no dig over tilling?
Tilling has long been the default because it looks effective in the short term. Freshly tilled soil appears soft and clean. But that smooth start comes with tradeoffs. Tilling chops earthworm channels and fungal threads, breaks apart soil aggregates, and brings up buried weed seeds. After a heavy rain, that loosened soil can crust, then compact. A few weeks later, you’re tilling again to fix the problems created by the first pass.
No dig takes the opposite path. You build structure rather than break it. Here are practical advantages you’ll notice:
- Fewer weeds over time. The initial light barrier knocks back turf and many annuals. Because you don’t flip the soil, buried seeds stay buried. Routine mulching shades out new arrivals.
- Better moisture management. Mulch reduces evaporation, and organic layers act like a sponge. Beds stay more even through dry spells and heavy storms.
- Less labor after setup. You trade one initial building day for many seasons of light maintenance: top up mulch, harvest, and replant.
- Soil life thrives. Worms, beetles, and microbes expand pore space, improving drainage and oxygen flow. Fungal networks help plants access nutrients.
- Soil structure improves naturally. Over time, you get a friable crumb that resists compaction and holds nutrients.
- All-season flexibility. You can build beds in spring, summer, or fall. In cool climates, fall builds are ideal; materials mellow by spring.
None of this requires perfection. The beauty of no dig is that it works even when materials are imperfect or your layers aren’t textbook neat. The living system adapts, and each top-up improves the bed.
Tools and materials checklist
You do not need special equipment. Gather a few basics and focus on the core ingredients: a light barrier, a planting layer, and a protective mulch. Here’s a field-tested list that balances availability, cost, and results.
- Cardboard or heavy paper (remove all tape and labels). Plain, brown, uncoated cardboard is best.
- Compost (mature, finished, weed-seed-free). Homemade, municipal, or quality bagged compost all work.
- Mulch (straw without seedheads, shredded leaves, arborist wood chips for paths, or coarse compost). Choose what’s abundant locally.
- Optional soil mix for the top few inches if your compost is coarse (e.g., 70 percent compost, 30 percent screened topsoil).
- Water source (hose with spray head, watering can, or drip line).
- Basic tools: rake, garden fork (for lifting—not turning), spade or shovel, wheelbarrow, scissors/knife for cutting cardboard, and a hand trowel.
- Bed edging (optional): untreated wooden boards, bricks, or stones. Edging keeps materials tidy, especially on slopes.
Local sourcing keeps costs low. Bagged compost is convenient but pricier; municipal or landscape supply compost by the yard is usually more economical for larger beds. Leaves and straw often come free or cheap in fall; chips for paths are frequently available from arborists.
Plan your site, size, and layout
Good planning saves work later. Spend a few minutes on light, access, and water. Sketch your plan, then mark the bed on the ground with a rope or hose to check fit and flow.
- Sun: Most vegetables want 6–8 hours of direct light. Observe shade lines from fences and trees across seasons.
- Size: Start small enough to finish in a day. A common bed is 4 feet wide by 8–12 feet long. Keep the width to what you can comfortably reach from both sides without stepping into the bed.
- Orientation: Long edges north–south help even sun exposure, though east–west is fine if it suits your space.
- Access paths: Plan 18–24 inch paths so wheelbarrows and knees can pass. Mulch paths with wood chips or cardboard plus chips for a clean, low-maintenance walkway.
- Water: Place beds within easy hose reach and consider drip lines if you live in a dry climate.
- Drainage: Avoid low spots that puddle for days. On slight slopes, run beds along the contour to slow runoff.
Mark the bed outline with string, stakes, or flour. If you’re converting lawn, mow low before laying cardboard. Pull any woody stems that could poke through the barrier.
Step-by-step: Build your first bed
Here is a straightforward build that works in most soils and climates. Think of it like making a layered casserole for soil life. Precision helps, but what matters most is generous coverage and consistent moisture.
- Prep the site. Mow or scythe existing vegetation as close to the ground as possible. Remove rocks or sticks that could tear your barrier.
- Lay the light barrier. Overlap brown cardboard by 6–8 inches so no green peeks through. Two thin layers are better than one thick, but don’t overdo it; you want water and roots to move downward. Wet the cardboard thoroughly so it molds to the ground and begins softening.
- Add the planting layer. Spread 3–4 inches of mature compost across the entire bed. If your compost is rough, top it with 1–2 inches of a fine compost/soil blend for easier seeding. Rake level.
- Mulch the surface. Add 2–3 inches of straw or shredded leaves on top. Keep a small circle open around each transplant stem to avoid rot. For direct seeding, pull mulch aside in narrow rows and sow into the compost.
- Water deeply. A long soak helps settle layers and invites earthworms. Moisture is the accelerator for decomposition and root establishment.
- Plant. Transplant sturdy starts (kale, lettuce, chard, tomatoes after frost danger, herbs, flowers) right away, or seed quick crops (radishes, arugula, peas). Push aside mulch for a clean sowing strip and cover seed as directed.
That’s the whole build. With good compost, you can plant the same day. If your compost is very hot or fresh, let the bed rest a week and water it a few times, then plant. To keep edges neat, consider a simple board frame or brick border. On slopes, a frame helps hold layers during heavy rain.

Two practical tips make the first weeks smoother. First, watch edges; that’s where light sneaks in. If a few grass blades poke along the sides, tuck them under extra cardboard and mulch. Second, top up mulch if you see bare compost. Light is great for seedlings, not for weed seeds.
Planting a no dig garden bed through the seasons
Once the bed is built, you can plant like any other garden plot, with a few small adjustments for the mulch surface. Transplants slip into the compost easily. For seeds, just clear a narrow strip or small patches through the mulch so seeds have light contact with the compost below.
Spring: Greens, peas, beets, carrots (sow into raked, fine compost), onions, scallions, spinach, and early herbs thrive. Keep mulch a little thinner over seed rows until seedlings are established, then feather it back to shade exposed soil.
Summer: Tomatoes, peppers, squash, cucumbers, corn, beans, basil, and cut flowers love the stable moisture. Mulch is your friend here; replenish lightly as it slumps to keep the soil cool. If heat is intense, consider light shade cloth during the hottest afternoons for tender greens.
Fall: As crops come out, rake back mulch, add a 1–2 inch layer of compost where you’ll replant, and tuck mulch around young starts. Cool-season crops—kale, Asian greens, lettuces, cilantro, radishes—slide right into the refreshed surface. Sowing a cover crop in open patches keeps roots in the soil over winter.
Winter: In cold regions, top up mulch to protect soil. In mild climates, plant hardy greens and alliums. Either way, keep the bed covered with living plants or mulch. Bare soil is the only real enemy.
Interplanting works beautifully in no dig. Pair deep roots with shallow roots, tall with short, fast with slow. For example, set tomatoes with a skirt of basil and lettuce; sow radishes between young brassicas; slip cilantro along the edge of bush beans. The continuous cover suppresses weeds and maximizes harvests per square foot.
Watering, mulching, and daily care
No dig beds are forgiving, but steady care rewards you with steady harvests. Most of the routine revolves around water, mulch, and observation.
- Watering: Check moisture by pushing a finger through the mulch into the compost. If it’s dry an inch down, water. A slow soak is better than frequent sprinkles. Drip lines under mulch are highly efficient.
- Mulch maintenance: Keep 1–3 inches on the surface through the growing season. Pull it back slightly for young seedlings to ensure warmth, then tuck it around stems once they strengthen. Replenish as it slumps.
- Weeding: Most weeds uproot easily from compost. Pull them small and lay them on the mulch to dry. If a perennial slips through a seam, shade it out with another piece of cardboard and cover with mulch.
- Feeding: In a well-built bed, many crops need no additional inputs. For heavy feeders (tomatoes, corn, squash), a light side-dress of compost midseason or a diluted fish/seaweed solution can help, but compost top-ups at replanting are usually enough.
Above all, observe. Mulch and water are levers you can adjust quickly. If leaves look pale, check for soggy or dry soil before adding nutrients. If growth stalls in heat, refresh mulch and add shade for a week. A few small touches keep momentum going.
Low-spray pest management and biodiversity support
A thriving no dig bed tends to have fewer pest problems because it supports a balanced food web. The goal isn’t to eradicate every insect; it’s to create conditions where plants are strong and helpful predators have a home. Focus on habitat, timing, and gentle interventions.
- Diverse plantings: Mix families and add flowers like calendula, alyssum, dill, and fennel. These provide nectar and shelter for lady beetles, lacewings, hoverflies, and parasitic wasps.
- Physical barriers: In the early weeks, use row cover over brassicas against cabbage moths, and collars around young stems if cutworms are present. Handpicking small outbreaks is simple when mulch keeps foliage clean.
- Timing and spacing: Succession sowing avoids big monoculture blocks. Stagger plantings so pests find less uniform food. Good airflow reduces mildew risk.
- Slug and snail control: Keep mulch a little thinner right around vulnerable seedlings, water in the morning, and set simple traps (boards, citrus rinds) you can check and clear. Encourage frogs and ground beetles with small, damp refuges at bed edges.
- Healthy soil first: Strong plants handle minor nibbling. Keep soil covered, avoid overwatering, and top up compost at replanting so growth keeps pace with the season.
When you do need a product, choose least-disruptive options and follow labels. Often a small nudge—netting on a bed of kale for two weeks, or a quick blast of water to dislodge aphids—solves the problem without collateral damage. The more life your bed hosts, the more it balances itself.
Troubleshooting: compaction, weeds, slugs, and more
Even with a solid plan, real gardens throw curveballs. Use this quick triage guide. Start by checking moisture and mulch, then adjust one variable at a time.
- Bed feels dense or roots struggle: Add a thicker blanket of compost at the next replant (2 inches). Keep mulch on the surface and avoid stepping in the bed; use boards temporarily if you need to access the middle.
- Weeds appearing: Most likely along edges or in thin mulch. Tuck in more cardboard along borders, add mulch, and hand pull before weeds seed. After a few cycles, the pressure drops dramatically.
- Slugs/snails abundant: Thin mulch immediately around seedlings; water at sunrise instead of dusk; use boards or grapefruit halves as traps and clear them daily for a week.
- Yellowing leaves, slow growth: Check moisture first, then temperature. If soil is cold early in spring, use a lighter mulch until warmth returns. Side-dress with a little compost for heavy feeders.
- Mushrooms in mulch: Great news. Fungi are working. If they crowd seedlings, brush them aside; otherwise, leave them to cycle nutrients.
- Rodents burrowing: Keep path mulch tidy, avoid dense brush piles near beds, and harvest on time. In tough cases, line the bottom of framed beds with hardware cloth before layering.
Each fix is simple and cumulative. Your bed improves with every adjustment. By year two, most issues are quick five-minute chores.
Year-by-year maintenance and soil improvement
No dig isn’t a one-off project; it’s a light, steady routine. The principle is always the same: harvest, add compost where needed, maintain mulch, and keep roots in the ground as much as possible.
- At replanting: Rake mulch aside, add 1–2 inches of compost where you’ll plant, level, tuck mulch back.
- Once or twice per year: Give the entire bed a blanket of compost 1–2 inches thick. Spring and fall are convenient times.
- Keep living roots: Use quick cover crops (buckwheat in summer, oats or crimson clover in fall) in open patches. They feed soil life and occupy space weeds might claim.
- Mulch refresh: As mulch slumps and disappears, top it up. Over years, that top-up becomes rich topsoil.
A mature bed feels different underfoot: springy, not squishy; rich, not sticky. Tool blades slip in easily. Roots dive deeper. Water soaks in and holds. That’s the payoff for your steady layering habit.
Variations: raised frames, containers, and small spaces
The same no dig logic adapts to many layouts.
- Raised frames: Edge the bed with untreated boards, bricks, or stones. Lay cardboard on the native soil, then fill with compost and top with mulch. Frames are helpful on slopes or where soil is shallow.
- Containers: Use a deep container (at least 10–12 inches) with drainage holes. Fill mostly with compost plus a little topsoil or peat-free potting mix for texture. Keep the top mulched to reduce watering frequency.
- Small patios and balconies: Focus on salad greens, herbs, bush tomatoes, small peppers, and compact flowers. Interplant to keep the surface covered.
- Community plots: Cardboard plus compost is a quick way to start without digging. Mulched paths keep your plot neat and neighbor-friendly.
In all variations, the essentials are the same: consistent coverage, regular compost additions, and mindful watering.
Budgeting, sourcing, and sustainability tips
No dig gardening can be as frugal or as fancy as you like. The core inputs—cardboard, compost, and mulch—are widely available, and many can be sourced free or low-cost.
- Cardboard: Ask local appliance and bike shops for large, plain boxes. Remove tape and staples.
- Compost: Start a simple backyard pile or bin to supply some of your needs. For bulk, check city programs or landscape suppliers. Inspect before buying; it should smell earthy, not sour or ammonia-like.
- Mulch: In fall, collect bagged leaves from curbside (where permitted). Shred with a mower for a fluffy, long-lasting mulch. Many arborists deliver wood chips for free; use them on paths and perennial borders.
- Tools: Share within a neighborhood group or rent rarely used items.
- Seed and plant swaps: Trade extras with friends and fellow gardeners, especially for flowers that attract beneficial insects.
Scaling smartly matters. Build one bed fully rather than three halfway. As that bed starts producing, use its harvest and lessons to fund and guide the next expansion. This steady approach keeps costs predictable and results strong.
Frequently asked questions
Do I need to remove grass first? No. Lay overlapping cardboard right on top of trimmed turf and water it. The grass breaks down in place under the light barrier.
How thick should the compost be? Aim for 3–4 inches for the initial build. If you only have 2 inches, it still works; you may just need to top up sooner.
Will cardboard harm soil? Plain brown boxes without glossy coatings decompose into organic matter and help kickstart the bed. Remove tape and labels.
What about clay soil? No dig shines on clay. The layers keep it from sealing over, and organic matter binds particles into a crumbly structure. Be patient; the second year often shows a big leap.
Can I seed carrots and beets? Yes. Rake the compost surface smooth, pull mulch aside into rows, sow thinly, and keep evenly moist until emergence.
How do I rotate crops? In small spaces, focus on diversity rather than strict rotations. Don’t plant the same family in the same exact spot season after season. Mix families and interplant.
Is wood chip mulch safe on beds? Use chips mainly on paths. On the bed itself, straw, shredded leaves, or compost mulch work better for vegetables. If chips touch planting zones, keep them thin.
Next steps and further learning
Your first bed is the hardest part. Pick a sunny spot, gather cardboard and compost, and build. Then observe how the bed behaves in your climate and adjust water and mulch. If you want ideas for other projects and family-friendly tech and garden workflows, browse the main site at familytechy.com for inspiration that complements a low-input, high-enjoyment backyard.
One season from now, you’ll have salads from spring to fall, sturdy herbs for the kitchen, and soil that looks darker and richer than when you started. Two seasons from now, you’ll wonder why you ever wrestled with a tiller. Keep the surface covered, keep adding compost, and keep planting. The system strengthens itself.