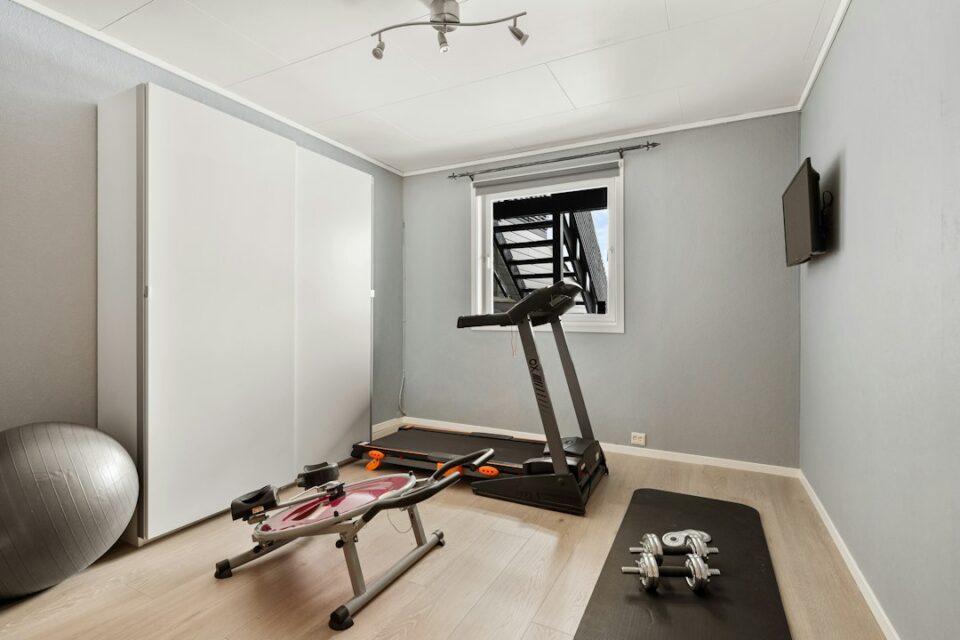
Tips for Using Home Exercise Equipment is about building a calm, repeatable system around the gear you already own. Whether your home setup includes a treadmill, an exercise bike, a set of adjustable dumbbells, resistance bands, or just a sturdy yoga mat, the aim is simple: make starting easy, keep sessions steady, and help each workout feel safe, comfortable, and purposeful.
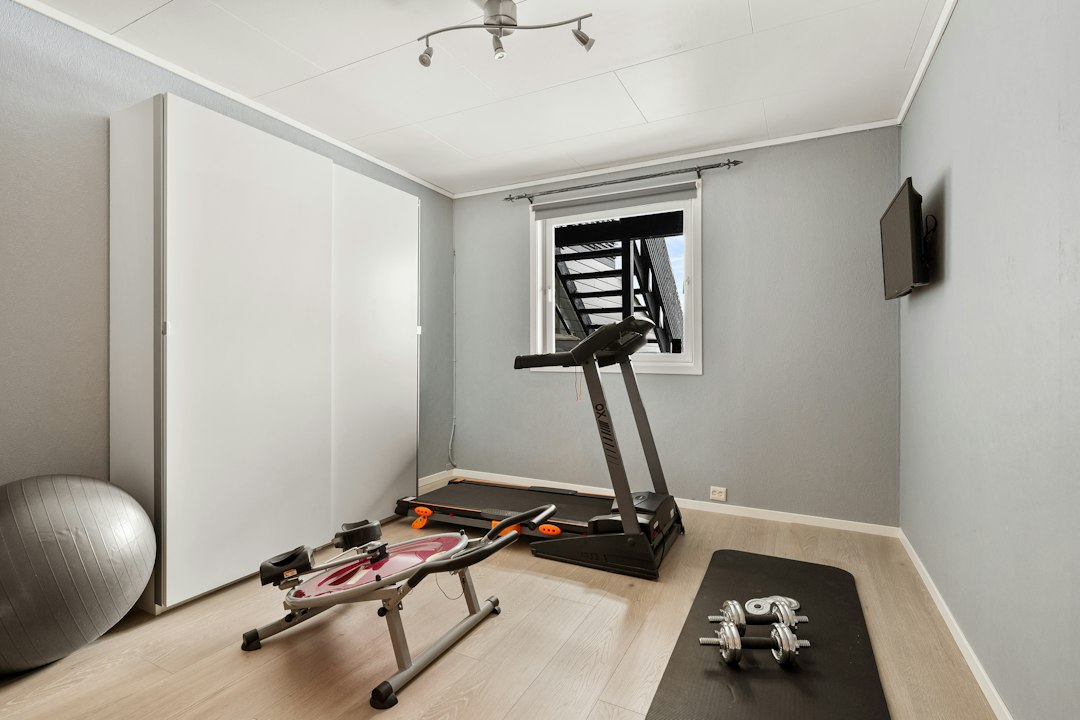
Tips for Using Home Exercise Equipment: Quick Start
Quick wins build momentum. A short, low‑pressure plan beats an ambitious plan that rarely happens. Use this one‑page approach for two to four weeks and you’ll feel your routine settle in without drama.
- Pick one anchor exercise. Choose a primary movement that fits your current energy and your space: brisk walking on a treadmill or walking pad, easy cycling on a stationary bike, a simple dumbbell circuit (squats and rows), or a band‑based full‑body routine on a mat.
- Schedule lightly. Two to three short sessions (15–25 minutes) per week is enough to establish rhythm. If you finish a session feeling like you could do a bit more, that’s a good sign.
- Remove setup friction. Store shoes, towel, and water bottle within reach of your gear. Keep your app or timer preloaded and place the remote on a small shelf or tray near eye level.
- Track one simple metric. Time, distance, total sets, or a single rep count. Easy tracking creates visible progress and keeps decisions light.
- Use effort ranges rather than absolutes. Rate intensity on a 1–10 scale. Keep most work at 6–7; reserve the 8–9 effort days for when you feel rested and focused.
With this quick start, you’re not chasing perfect. You’re building a routine that fits your actual life and space. Small steps compound quickly when the environment makes starting straightforward.
Plan Your Space Like a Mini Gym
A clear, functional corner can feel just as inviting as a full room. Mapping the area, fixing the floor, and giving everything a home turns “I should work out” into “I’m ready to go.”
Measure and map. Note length, width, outlet placement, natural light, door swing, and footpaths. Sketch a quick floor plan—paper and pencil is fine. Mark where large items sit and how much clearance their moving parts need (rails, pedals, handles).
Choose better flooring. A sturdy mat or rubber tiles reduce vibration and protect wood, vinyl, or carpet. In upstairs rooms or apartments, thicker mats lower noise transfer and keep neighboring rooms quieter.
Light and airflow. Indirect light keeps consoles readable without glare. Add a compact fan or open a window slightly to keep the air feeling fresh. In garages or basements, a dehumidifier and a simple box fan can help the space feel more comfortable.
Storage that speeds setup. Wall hooks for bands and straps, a small rack for dumbbells, and a compact cart for towels, remotes, and device chargers keep everything within reach. Put the most used items between knee and shoulder height so you don’t dig around mid‑session.
Sound management. Headphones or a small Bluetooth speaker give you control over volume. If you share the area, a “session in progress” sign or a quiet timer on a shelf helps family members know when interruptions will break your focus.
- Mini‑gym checklist:
- Stable base under large gear (mat or platform)
- No cords across walkways
- Dedicated hooks or bins for bands and accessories
- Outlet access for powered equipment
- Timer or app visible from your main station
For more space planning ideas and smart home tips, you can explore guides on FamilyTechy, which often cover practical ways to set up small corners that still feel clean and efficient.
Choose Equipment by Goals, Not Gadgets
Matching gear to goals keeps your setup tight and your sessions straightforward. Think outcome first, then filter by space, noise, and budget.
Cardio outcomes. Treadmills, walking pads, magnetic‑drive bikes, rowers, and compact ellipticals support steady efforts and simple progression. If you need quiet, walking pads and magnetic‑resistance bikes typically hum less than motorized options.
Strength outcomes. Adjustable dumbbells, kettlebells, a foldable bench, and resistance bands deliver many movement patterns without taking over a room. A door‑mounted pull‑up bar adds vertical pulling without permanent installation.
Mobility outcomes. A thick mat, foam roller, and light bands cover warm‑ups and cooldowns, plus low‑impact sessions on recovery days. Sliders and a balance pad create variety without adding bulk or noise.
Hybrid sessions. Rowers blend strength and cardio through resistance. Circuits that alternate a bike interval with a dumbbell set keep heart rate steady while building movement capacity.
- Decision grid:
- Outcome: endurance, strength, or general fitness
- Space: dedicated corner vs. stow‑away under a bed
- Noise: quiet hours vs. daytime flexibility
- Budget: one versatile piece now vs. phased upgrades later
Once you anchor on outcome, ignore trendy features that don’t serve your plan. When the basics feel natural, you can add accessories that genuinely improve comfort and consistency.
Smart Setup Fundamentals
Good setup takes minutes but pays off every time you press start. A level base, thoughtful cord routing, and labeled settings create a smoother, calmer session.
- Level. Place a bubble level on benches, bikes, and treadmills. Adjust feet or shims until frames sit square. Level equipment feels better and reduces odd noises.
- Anchor. For gear that slides, a textured rubber mat lowers micro‑movement and vibration. If the mat creeps on slick floors, secure the edges with non‑marking tape.
- Arrange controls. Set brightness and volume for consoles and remotes. A tablet stand at eye level reduces head‑down time during intervals and helps you follow a class without craning your neck.
- Create a grab kit. Keep towel, water bottle, bands, and a small notebook together. The fewer steps between you and the first minute, the more sessions you complete.
- Label settings. Write down seat height, handlebar reach, incline presets, strap holes, and favorite intervals. Stick a small card on the wall so anyone can restore the setup in seconds.
For powered equipment, use outlets with enough headroom and route cords along walls. In shared rooms, a low‑profile cable cover keeps paths clear and avoids snags.
Safety Habits That Stick
Safer movement grows from tiny habits that don’t feel like chores. Design the environment well, dial effort with awareness, and keep your floor clear.
- Warm‑ups. Two to five minutes of easy movement—walking, pedaling, band pull‑aparts, and arm circles—prepares your body for the main work without draining energy.
- Know the controls. Practice how to pause, slow, or step off your treadmill or bike during a calm minute. Familiarity lowers stress when you change pace later.
- Train within control. Use effort ranges. Most sets should feel steady, with smooth breathing and conversation possible. Save high‑effort bursts for short segments.
- Keep the area tidy. Return bands to hooks, stash straps in bins, and coil cords near walls. Fewer loose items reduce chances of tripping or distraction.
- Footwear and grip. Clean shoe tread and dry hands on bars or handles help you feel planted. If handles feel slick, add a light chalk towel or replace worn grips.
These habits require minutes to learn and seconds to apply. The payoff is predictable, repeatable sessions that you can build on week after week.
Technique and Pacing: Getting the Most from Every Session
Form amplifies results. A few simple cues make equipment feel better and keep you moving efficiently. Combine technique with pacing so intervals never feel chaotic.
Cardio cues.
- Treadmill or walking pad: Stand tall, eyes forward, hands light if needed. Land under your hips instead of reaching far ahead. Keep steps soft to reduce impact noise and improve comfort.
- Stationary bike: Set saddle height so your knee has a gentle bend at the bottom of the stroke. Relax your shoulders, sit tall, and let resistance—not frantic speed—guide intensity. Aim for smooth cadence.
- Rower: Think “legs, then hips, then arms” on the drive; reverse the order on the recovery. Keep strokes fluid instead of jerky.
Strength cues.
- Goblet squat: Chest up, elbows near ribs, heels planted. Move within a range that feels steady. Exhale gently as you stand.
- Kettlebell deadlift or swing: Hinge at the hips, shins vertical, let your hips power the movement. Finish tall and relaxed rather than yanking the bell.
- Presses and pulls: Set bench or handle height so joints move comfortably. Smooth reps build capacity; grinding reps add fatigue without useful payoff.
Reliable pacing. Use simple blocks. Example cardio template: 5 minutes easy, 4 rounds of 2 minutes moderate + 1 minute easy, then 4 minutes easy. Example strength template: 2 warm‑up sets, 2–3 working sets, a short finisher (band pull‑aparts or plank), and a relaxed cooldown.
Maintenance and Care Routines for Common Machines
Your equipment doesn’t need a full workshop. A brief care routine keeps frames tight, belts aligned, and consoles clean so sessions feel smooth.
- Weekly wipe‑down. After sessions, wipe sweat and dust from frames, pads, belts, and consoles using a microfiber cloth and a mild cleaner. This helps grips stay tacky and screens readable.
- Monthly look‑over. Check bolts, knobs, pedals, straps, and footplates. Inspect treadmill belt alignment and rail cleanliness. Tighten hardware lightly—no need to crank.
- Quarterly deep clean. Vacuum near motors and under equipment. Inspect power cables and plugs. If a mat is permanently compressed or slick, consider replacing it.
- Lubrication and alignment. Follow manufacturer guidance for treadmill belts and rowing rails. Note the date on a small card taped inside a storage bin so you remember intervals.
Keep a tiny toolkit: hex keys, screwdriver, microfiber cloths, and a small flashlight. If something feels off—odd clicks, wobble, or sticky levers—pause and check the manual. Most issues resolve with simple adjustments, and a calm look avoids bigger hassles later.
Treadmill and Walking Pad Know‑How
Treadmills and walking pads anchor many home setups. They’re convenient, friendly to beginners, and useful during quiet hours. A few details make them feel better and last longer.
Placement and mats. Put the deck on a sturdy mat that spans the full footprint. This lowers vibration and helps the machine stay put, especially on smooth floors.
Belt alignment and noise. If you hear rubbing, center the belt using the rear adjustment screws (small turns go a long way). Clean rails and wipe dust near the motor area with care. Most hums and squeaks fade when the deck is level and the belt tracks cleanly.
Console comfort. Elevate your device to eye level using a stand or shelf so intervals don’t make you look down. On longer walks, a light fan pointed across the deck helps you stay comfortable without blasting your face.
Session ideas. For steady walks: 10 minutes easy, 10–20 minutes moderate pace, 5 minutes easy. For incline spice (if your model supports it): ladder up in small steps, and pair each step with a minute at an easier pace. Keep footfalls light to reduce impact noise and maintain rhythm.
Common fixes. If the deck feels slick, clean it and reassess your shoes. If the belt feels grabby, confirm lubrication guidance in the manual rather than improvising. When power fluctuates, try a dedicated outlet and check the cord for wear.
Exercise Bike Setup Guide and Comfort Tweaks
A bike can deliver quiet cardio with minimal footprint. Most comfort issues vanish when the saddle, bars, and pedals suit your body. Here’s a short fit checklist.
- Saddle height. Aim for a small bend in your knee at the bottom of the stroke—no locked knees and no heavy rock in your hips.
- Fore‑aft and bar reach. Adjust forward/back so your knees track comfortably over the pedals. Set handlebar reach so your shoulders aren’t crowded or overly stretched.
- Cadence and resistance. Smooth pedal strokes trump high numbers. Use resistance to find a comfortable yet steady effort, then keep cadence even rather than sprinting in every interval.
Comfort upgrades. A gentle‑cushion saddle cover, padded shorts, or gel handlebar tape can help long rides feel friendly. If pedals feel off, consider toe cages or clip‑in pedals matched to a basic cycling shoe.
Session ideas. Easy spin: 5 minutes warm‑up, 6 rounds of 2 minutes steady + 1 minute relaxed, 5 minutes cooldown. Mixed intervals: 5 minutes warm‑up, 4 rounds of 90 seconds moderate + 30 seconds slightly higher resistance, 5 minutes cooldown. Choose resistance that supports smooth rhythm rather than forcing choppy effort.
Common fixes. Clicking sounds often resolve with a light pedal tightening or reseating. If the console reads strangely, replace batteries or reseat the sensor. When the bike feels wobbly, re‑level the feet and confirm the mat grips the floor.
Strength Tools: Dumbbells, Kettlebells, and Bands
Strength tools multiply movement options quickly. The goal is balance: push, pull, hinge, squat, and carry patterns sprinkled across the week. Here’s how to keep it simple.
Adjustable dumbbells. Great for tight spaces. Store them near a foldable bench or a stable chair. A basic circuit—goblet squats, dumbbell rows, and overhead presses—covers big muscle groups and doesn’t require elaborate setup.
Kettlebells. Even a single bell goes far. Hinge‑based moves (deadlifts or swings), goblet squats, and carries (suitcase or rack) are efficient and easy to learn. Keep the bell on a mat so the floor stays safe and the base doesn’t slide.
Resistance bands. Bands add variety with minimal noise and storage needs. Anchor them to a closed door for rows, presses, and rotations, or loop light bands around feet for warm‑ups and accessory work.
Simple strength templates.
- Strength 25: Warm‑up 5 minutes; main lift 10 minutes (two or three sets); accessory 8 minutes; cooldown 2 minutes.
- Upper‑lower split: Two days per week—push/pull on day one; squat/hinge on day two. Keep accessory work brief and precise.
- Core and carry add‑ons: Planks, dead bugs, and carries sprinkled into the last five minutes help posture and daily comfort.
Storage and labels. Put bands on labeled hooks by tension (light, medium, heavy). Keep lighter dumbbells higher, heavier ones lower to reduce awkward reaches. A small notebook or note card with favorite sets streamlines decisions at the start of each session.
Small‑Space and Quiet‑Hour Solutions
Most homes don’t have dedicated gym rooms. You can build a dependable routine in a bedroom corner, a living room alcove, or near your desk, even during early mornings or late evenings.
Fold and roll. Choose gear that folds (benches, walking pads) or stores vertically (adjustable dumbbells, kettlebells, bands on hooks). A rolling cart turns a hallway nook into a flexible mini gym. Put towels and device chargers on the top shelf and heavier accessories on the lower shelf.
Compact circuits. Alternate two movements that need only a mat and a pair of weights, such as squats and rows. Add a third movement like a plank or dead bug for a steady core block. Circuits spread effort across big muscles without noisy transitions.
Sound‑friendly options. Walking pads, elliptical gliders, and magnetic‑drive bikes are generally quieter than rowers or plyometrics. Use thicker mats and focus on soft landings for floor work. Keep music on headphones if others are sleeping.
Time windows. Early morning or late evening sessions pair well with calmer choices. Swap jumping for tempo squats, hard sprints for controlled intervals, and loud speakers for a playlist on low volume.
Build around your real constraints. When equipment and programming match your home’s rhythm, your routine sticks.
Programming and Progress Without Overcomplicating It
You don’t need a complex spreadsheet to make steady progress at home. A simple weekly rhythm plus tiny adjustments leads to durable changes without burnout.
Weekly rhythm. Try two strength days, one cardio day, and one gentle mobility day. If you prefer cardio, flip the ratio but keep at least one strength session to support posture and everyday tasks.
Progress dial. Every two weeks, change one variable: add 2–5 minutes, add a set, or nudge resistance slightly. Keep changes small enough that the session still feels doable after a busy day.
Session templates.
- Cardio 20: Warm‑up 5 minutes; intervals 10 minutes (short lifts in effort); cooldown 5 minutes.
- Strength 30: Warm‑up 5 minutes; main lift 15 minutes (three sets); accessory 8 minutes; cooldown 2 minutes.
- Mobility 15: Hips, thoracic spine, ankles, and shoulders with slow breathing and gentle ranges.
Seasonal tweaks. In hot months, shift sessions to cooler times and use fans. In colder months, start with a longer warm‑up, add a light hoodie, and keep hands warm so grips feel secure. Your program can flex with the calendar without losing momentum.
Tech, Data, and Smart Accessories
Technology can remove guesswork and add just enough structure to make sessions simpler to start and finish. Use it to support your plan rather than dictate it.
Timers and intervals. A basic interval app keeps you on track. Pre‑set work and rest windows so you don’t fumble for a phone during sets.
Wearables. Heart‑rate and cadence sensors add context to effort. Look for weekly trends rather than perfect single numbers. A small wrist‑vibration alert can remind you to change pace without looking down.
Training apps. Guided platforms can provide variety and coaching cues. Favor programs that scale to your equipment and time windows, and avoid those that pressure you into new purchases.
Smart accessories. Tablet stands, bottle holders, tacky grip towels, and compact fans are inexpensive upgrades that make sessions comfortable. A surge‑protected power strip keeps cords tidy and electronics safe.
A good rule: if a tool saves setup time or mental effort, it’s helping. If it adds steps or decisions, simplify.
Troubleshooting and When to Seek Help
Small hiccups can stall momentum. Most home equipment issues respond to a calm look and a minor tweak. Here’s a practical list that often resolves common frustrations.
- Wobble or shake. Re‑level feet, add a textured mat, and tighten bolts in a star pattern (opposite corners) so tension spreads evenly.
- Unexpected noise. Clean rails and belts with a light wipe; confirm that the floor is level. If noise persists, check the manual for alignment or lubrication guidance and follow the steps carefully.
- Screen glare. Reposition the device or add a matte screen protector. Angle lighting so reflections bounce away from your eyes.
- Grip fatigue. Try tacky gloves or a chalk‑style towel. If handles are too thin or too thick, look for accessory grips that match your hand size better.
- Motivation dips. Switch to an 8–12 minute micro‑routine, pick a single anchor exercise, and use an easy timer. Lowering friction restores momentum more reliably than forcing intensity.
When to contact support. If a powered machine displays repeated error codes, loses power intermittently, or shows visible damage, stop using it and consult the manufacturer’s support page. Keep your model number and purchase details handy; most support pages offer straightforward checklists and clear next steps.
Home Equipment Etiquette for Shared Spaces
If multiple people use the same gear, small touches make sharing smooth and friendly. Post notes with settings, organize accessories by color or label, and keep the floor clear.
Shared settings. A sticky card near the bike or treadmill with seat heights, strap holes, and incline presets saves everyone time. If kids use the area, teach them to check for clear walkways and to listen for moving belts or pedals before stepping close.
Rotation circuits. Create simple stations—bike (easy pace), mat (hinge or squat), band row, and balance or mobility. Each person spends two minutes per station, rests one minute, and rotates to the next. Clear rules create a fun, predictable flow.
Keep sessions short. Shared sessions shine when they end on a high note: 20–30 minutes with a clear start and finish, a playlist, and a timer that everyone can see.
Beginner‑friendly cues. Use straightforward language: stand tall, soft knees, smooth breaths, and move within ranges that feel steady. Celebrate participation and repeatability rather than chasing high numbers.
Wrap‑Up: Build Your Sustainable Home Routine
Using home exercise equipment well is less about owning the perfect machine and more about building a simple, dependable system around the gear you already have. Start with one anchor exercise, keep your setup tidy, and label personal settings so the next session begins without hunting for knobs or straps. Add technology only where it reduces friction. Match choices to your goals, space, and quiet hours.
As weeks pass, adjust one variable at a time—minutes, sets, or modest resistance. Rotate templates that spread effort across your body, and choose sound‑friendly swaps when workouts land early or late. If anything feels off, troubleshoot with small adjustments or consult your manual before doing more. The aim is a routine that feels calm to start and satisfying to finish—one you can repeat, not endure. That’s how home equipment earns its keep and becomes part of your day rather than a reminder of stalled plans.